


andyfanshawe
-
Posts
7 -
Joined
-
Last visited
Content Type
Profiles
Forums
Events
Gallery
Store
Premium Membership Discounts
News
Videos
Posts posted by andyfanshawe
-
-
Does it only allow 10 photos to be hyperlinked in one post?
May repost the last bit so if anyone is too idle to click on the link,here the photos are!!
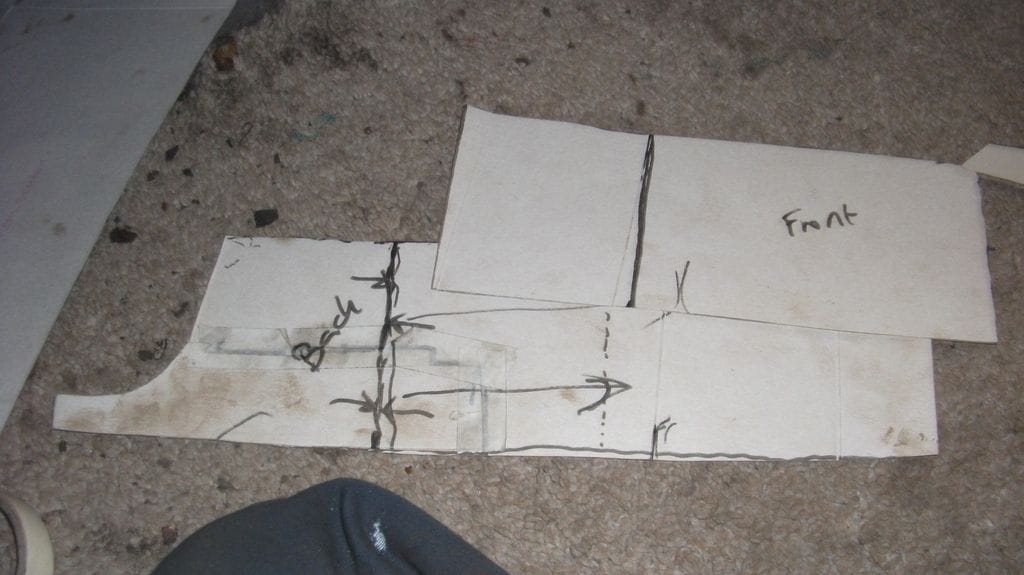
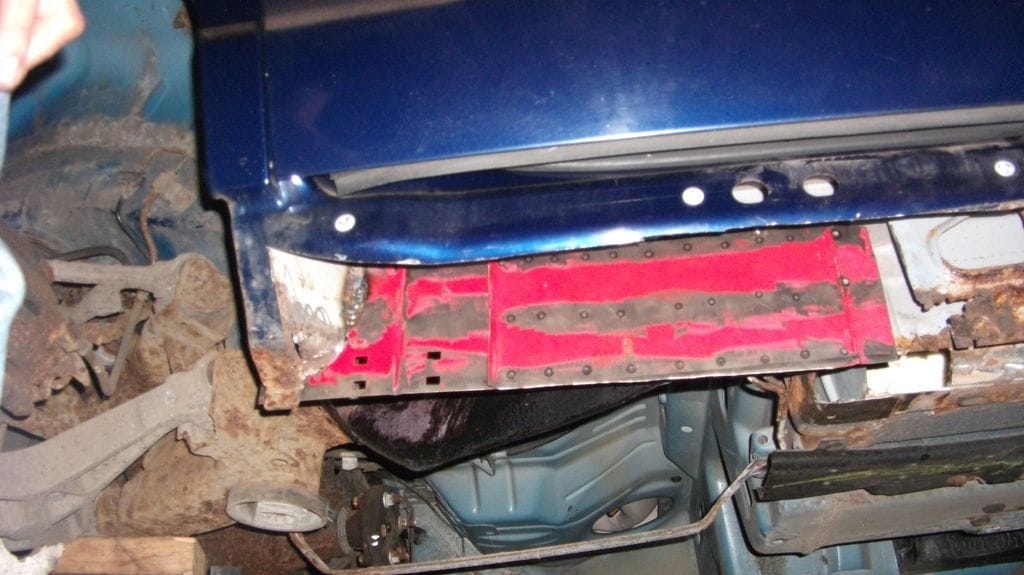
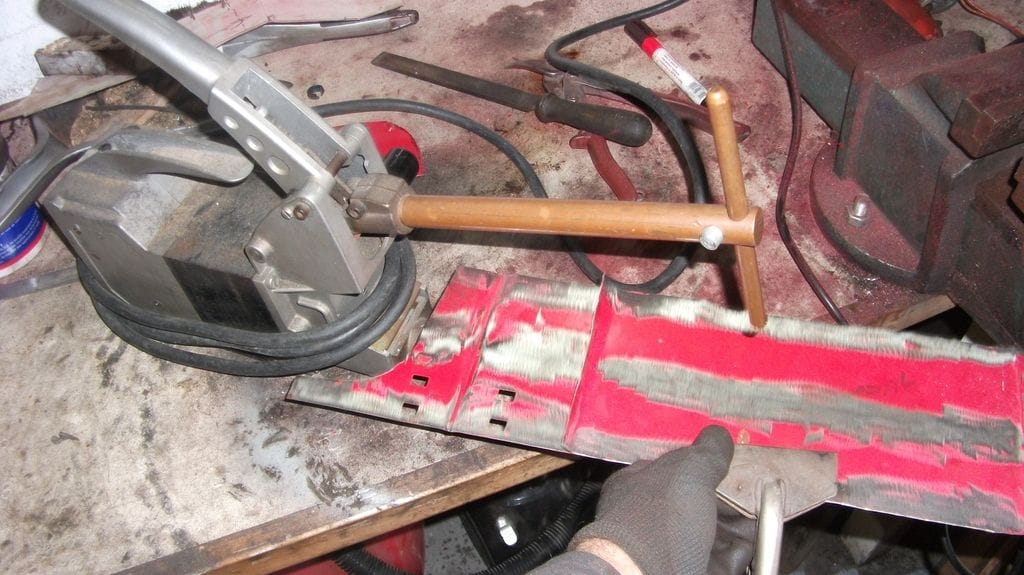
Here is the area cut out and the panel behind media blasted and painted with kurust Ive left the lower lip in to make sure I know where the panels line up.Cardboard templates made to mimic the original panels. ie in 2 sections spot welded togetherAnd cutout and spotwelded together with my trust spot welder
And tack welded in
And ran out of energy!! Until tomorrow.Andy.
Ive left the lower lip in to make sure I know where the panels line up.Cardboard templates made to mimic the original panels. ie in 2 sections spot welded togetherAnd cutout and spotwelded together with my trust spot welder
And tack welded in
And ran out of energy!! Until tomorrow.Andy. -
Hi Steve and peter.Not expensive for me cos I dont charge for my own labour! But taking a gamble on this car. certainly wasn't worth saving if I had to pay someone else to do it, but worth doing because its really nice in other respects. Be good for someone when its done. I've got 3 other customers resto's in, so this will have to go at some point. But it will be awesome!!!Part 2.......of the loooong journey.Off with the right rear wheel and the inner arch liner.Cleaned the steel up in the lower corner and only the first inch or two is weakCut out and a plate made and welded inMedia blaster outto clean up the top corner inside.Good penetration weld there!Cleaned all sound metal but with surface rust and painted it with KURUST. That aint coming back!Next bit marked for cuttingThis is the rear of the marked panel and the extent of the rustHere is the area cut out and the panel behind media blasted and painted with kurust
Ive left the lower lip in to make sure I know where the panels line up.Cardboard templates made to mimic the original panels. ie in 2 sections spot welded together
And cutout and spotwelded together with my trust spot welder
And tack welded in
And ran out of energy!! Until tomorrow.Andy.
-
Hi Peter.
Thanks for reply.
Small world, I worked at Newbold Community School (right next door to St Marys) for 23 years. Loved it, but haven't got the energy anymore.
I wil do my best to help out anybody I can. Im lucky enough to have my own garage so can spread out and have the luxury of a 4 ton car lift!
Andy.
-
That's gonna need a lot more than sills!! See my post and follow along...............
Oh, and they can be made very easily. Nothing special.
http://www.jaguarownersclub.com/forums/topic/12153-rusty-sills-fix-follow-along-please/#entry30932
Andy.
-
 1
1
-
-
Ok, here we go. Got a
cheap 2000 S type 3 litre V6.Plan is to restore and sell on in really good condition. Possible the only S type with rust free
sills!Did have a jag service history till about 2010,
then......who knows.Ended up with a gentleman who left it standing for 2 years
because he wasn't allowed to drive anymore, and,.....................oh, this
is boring, so lets get on with the rusty sills.Sill cover off on the drivers side (remove the black clips
from underneath, remove the mudflap by drilling out the rivet from underneath,
and pulling it off the cover. Go under front wheelarch and peel back the
lower corner and remove the torx screw that goes through the wing into the sill
cover. Then just pull the cover out
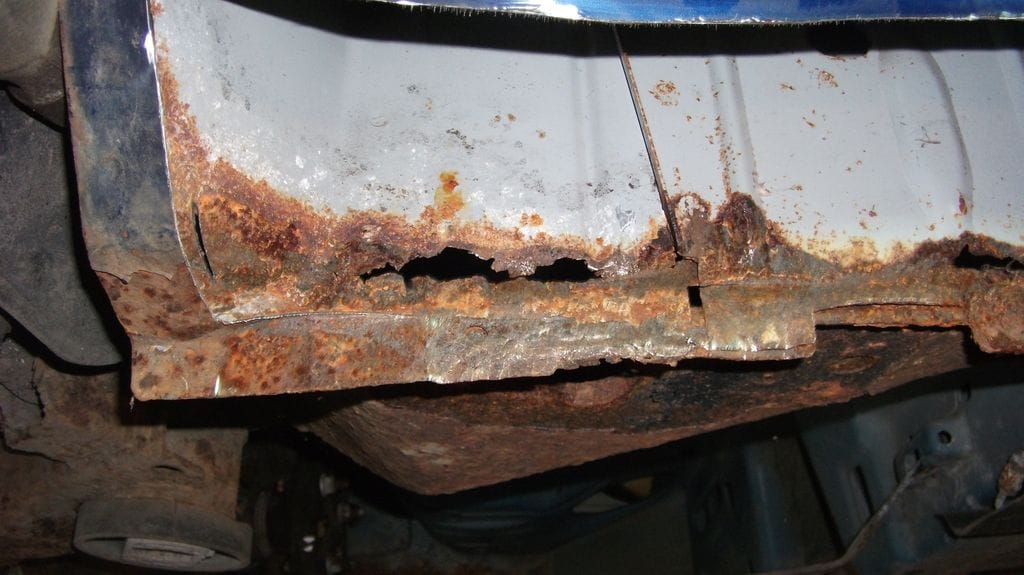
horizontally to remove it from its clips.Here's the first view from the front of the car towards the
backJust in front of the back wheel
Underneath just in front of the rear wheel where the sill
flanges have collapsed when jacking upFurther forwards
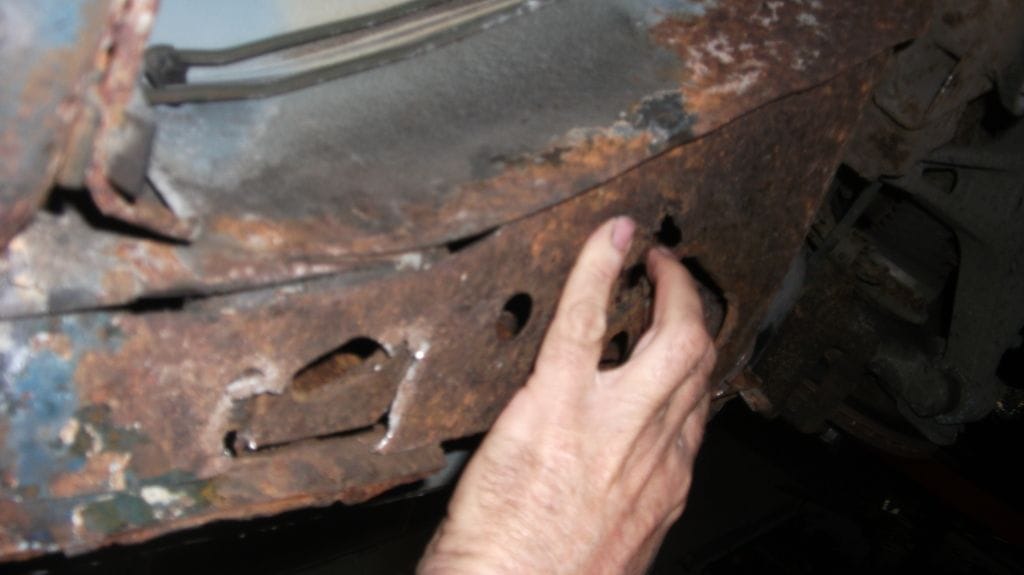
More damage, tip of iceberg style
First cut and outer skin peeled down
Been full of water eh?
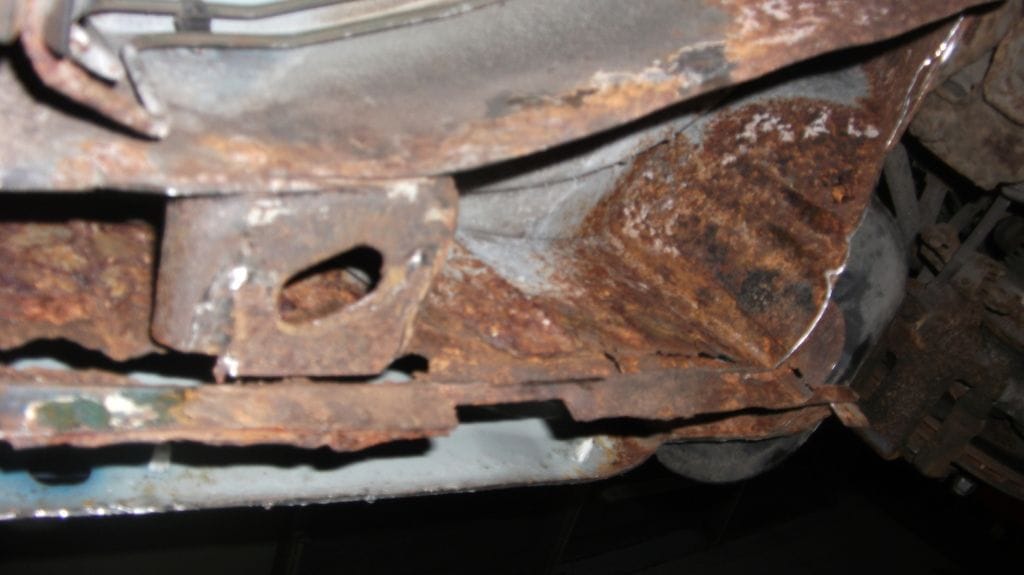
More revealed further back
And furthest back
Oops, last photo was wrong...
More at the back
Removing horizontal panel under floor just in front of rear
wheelAnd removed
Oh dear
Better start putting some steel back at some point!
Andy.
-
Hi.
I live in chesterfield in derbyshire and am lucky enough to own a 2.5 V6 X type sport estate (my Wifes car) and a 2000 3.0 V6 S type just bought. As well as many other vehicles, including american customs.
I have just retired from teaching maths after 33 years in secondary schools at the ripe old age of 54! Call it "burnt out"! Kids are brilliant, the pressures aren't. So a career change ensued starting a year or so ago!
I have been building radical american custom cars (www.lowcamaro.com) for years and luckily have a degree in maths and another in electronics. Also a qualified mechanic and welder/fabricator. i specialise in engine management systems and the use of oscilloscopes for diagnostics. My business is Andys American Kustoms and have a few restos underway. BUT........and this is where it becomes relevant here.........................
I was lucky enough to pick up a 2000 S type 3.0 V^ auto with cream leather interior and metallic blue paintwork. Standing for 2 years after the elderly owner couldn't drive anymore (why do they do that?). Failed MOT on idle emissions (probably stuck everything after 2 years!), all the brake pipes and a few suspension bushes. Oh, and humble things like windscreen wipers etc. Oh, and RUST. Along the usual place, along the sills, inner sills, floorpan and outriggers (whatever they are).
So, to build or break? Hmmm? Build of course. Restoration. never broken a car up yet and hopefully never will.
So, I will post on the forum (S type one!) a kind of step by step guide on how to replace rusty sills, inner sills, outriggers (never understood that name). No filler, no fibreglass, just plain old hard work with a bit (lot) of fresh steel and welding thrown in for good measure.. Please follow along while I play about cutting things out and probably swearing a lot.
At the end I want to produce a rust free jag that is structurally sound and a 12 month MOT and a clean bill of health. i will then sell it on to someone who will enjoy it. If I keep it, it will have air suspension, sit on the floor, blacked out chrome, no door handles, a roof chop and tinted windows. Oh and some silly big wheels. So, Im sure you lot dont want that to happen so it will go up for sale!!!
Ill start the the rusty sills thread later.
Enjoy.
Andy.


Rusty sills fix! Follow along please.............
in Jaguar S-Type Club
Posted
Hi Steve and Russ68.
Dont look under the covers! I did that once and look at the mess I'm in now!!!
Ill take it steady with the pictures.....
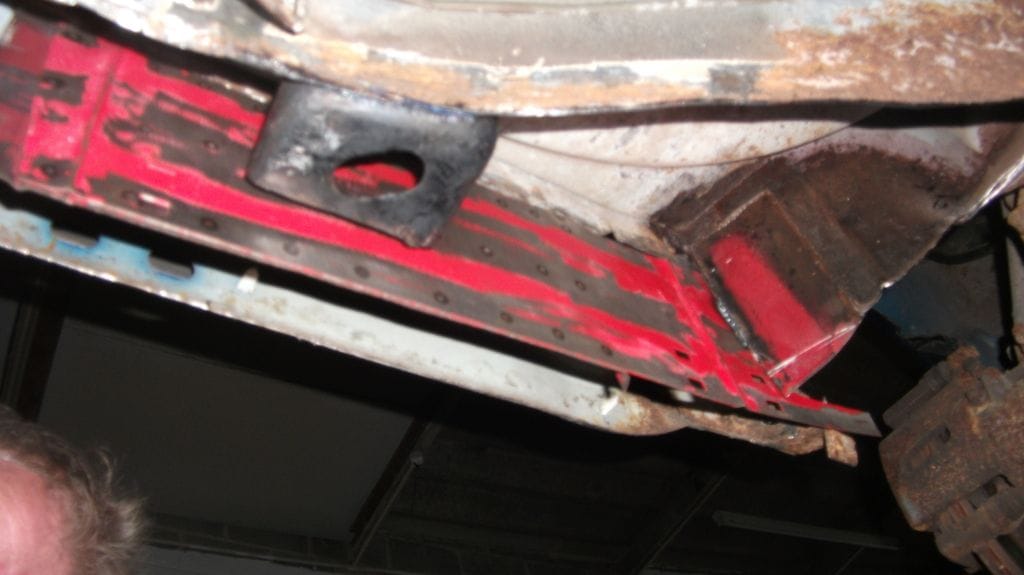
Today was weld up the steel that I had fabricated and make the bottom horizontal plate. This one.
And after 3 hours, here it is!
As you can probably tell Ive welded on a right angle flange to keep the strength in that area when someone uses a jack there.
Weld that in tomorrow after painting iut on the inside with etch primer and blue paint.
Speaking of blue paint, the inside of the cavity was prepped, etch primed and painted blue. Looks good even though no-one will see it, and it will be covered in dinitrol 3125 anyway!
Even more welding to do tomorrow then, but at least it will be pretty in blue!
Andy.