Jump to content


Can't open bonnet


180pete
 Share

Recommended Posts

Hi guys & gals, just tried to pull handle to open bonnet and it was very hard to pull, as I carried on pulling, suddenly something snapped, now

the handle is all loose and swinging in the breeze, doing absolutely bugger all, how do I now get the bonnet open?, answers please on a postcard

or you could reply on here 😂, the car is a 2003 XJ6 (X350) 3Ltr. V6 petrol, Any advice would be greatly appreciated, many thanks in anticipation 

of a shed load of replies all offering advice on what to do next (keep it clean, I'm not a contortionist) pete

Link to comment
Share on other sites


hi

found this on another site, dont know wheather it helps but here it is


This is a UK RHD X350, so all references are to a RHD model. LHD models may be different.
I managed to open the bonnet as follows:-

  1. The car has the standard chrome effect front grille with horizontal louvres. The two louvre panels are held in place by two deep locating lugs on the bottom edge and five small locating lugs along the top edge. By using two thin bladed screwdrivers, or similar, it is quite easy to remove the two panels. Close inspection of the louvre panels will show there is a small gap around their perimeter, where a thin blade can be inserted. I inserted one screwdriver in the gap immediately above one of the two vertical bars; and another screwdriver in the gap immediately above the other vertical bar. Applying gentle downward pressure to both screwdrivers resulted in the louvre panel popping out at the top; after that the louvre panels can be lifted out.
  2. With both louvre panels removed from the grille I could see the two bonnet catch locking mechanisms. The one on the drivers side was uncovered and it was easy to apply finger pressure on the operating lever (where the cable release nipple locates) and release the driver side catch.
  3. The passenger side catch locking mechanism was covered by a metal enclosure (maybe something to do with security); and there was an electrical device (turned out to be a switch) plugged into the bottom of the catch locking mechanism. Both the metal enclosure and the switch prevented me from getting access to the catch operating lever, as I had done on the driver side.
  4. On the left side (viewed from front) of the metal enclosure there is a dome headed T30 Torx fixing, which can be easily removed. The metal enclosure is fixed by more than one fixing, but once this one is removed, the metal enclosure can be prised aside to get access to the passenger side catch locking mechanism.
  5. At this stage, it may be possible to remove the switch fitted to the bottom of the catch locking mechanism. However, I could not remove it easily and did not want to damage it. Instead, I removed the two 10mm hex headed fixings that secure the catch locking mechanism to the chassis. Once removed, I was able to easily detach the electrical switch from it and operate the little locking lever, which released the passenger side catch and enabled the bonnet to be opened fully.

On inspection, it appears that the bonnet release cable goes from the bonnet release handle in the cabin to the passenger side bonnet catch locking mechanism; and then to the driver side bonnet catch locking mechanism. In my case the bonnet release cable appears to have snapped somewhere between the bonnet release handle and the passenger side catch locking mechanism.


cheers

Joe

Link to comment
Share on other sites

found this also
cheers
Joe
 
 
I have now successfully replaced the bonnet release cable on my Jaguar V6 3L X350 RHD. I took some photos during the replacement process and have recorded below the actions taken to replace it for the benefit of anyone else contemplating the task.

NOTE: This process is for replacing the bonnet release cable on a RHD model. Replacement of the cable on a LHD model is similar, but the brake servo on a LHD model is where the cabin pollen filter box is on the RHD model. If you have a LHD model look at Zazzy's very helpful instructions here: https://www.jaguarforums.com/forum/x...-cable-153012/

Tools & Parts Required For The Task Described
New Bonnet Release Cable (Jaguar Part No C2C34776 - Photo 1)
socket set with 8mm, 10mm & 13mm sockets
Torx 30 bit
Various Screwdrivers
Electric Drill & Drill Bits
Sharp Cold Chisel (about 15mm)
Hammer
Stanley Knife, or similar
Fish Wire (I used the copper conductor of 2.5 sq mm twin & earth cable)
Grease to lubricate new cable

Replacement Procedure

1. Open the bonnet and remove the Radiator Cover Trim (Photo2), which is held in place by six fixings.
2. Photo 3 shows the Radiator Cover Trim removed and the main engine bay components referred to in this procedure.
3. Although not strictly necessary, I removed the front chrome grille to give much better access to the two bonnet release catches
4. Remove the Top Radiator Bracket (LH) (Photo 4), which is fixed with three bolts.
5. Photo 5 shows the Top Radiator Bracket (LH) removed and the Bonnet Release Catch Cover prised away. NOTE: It is not necessary to prise the cover away in this manner - I did it to gain access to the release catch when my bonnet was stuck in the closed position.
6. Photo 6 shows one of the two riveted clips (Point A in Photo) that secures the bonnet release cable in the engine bay. This rivet also acts as one of three fixings for the Bonnet Release Catch Cover. This riveted clip puts a sharp bend on the Bonnet Release Cable and is best removed. Access to the rivet head is severely restricted by the radiator, but you can get to the back of the rivet from the top. I used a sharp 15mm cold chisel and hammer to cut off the back of the rivet, which then allowed the clip and Bonnet Release Catch Cover to be removed. I decided at this point not to replace the Bonnet Release Cover when re-assembling.
7. Prior to removing the two bonnet release catches, it is worth marking their exact location to assist re-alignment when re-assembling. In my case the re-alignment was easy, because there was no paint where the catch had to be located. Remove the left Bonnet Release Catch by removing the two fixing bolts, but be careful not to drop the bolts, or the part that the fixing bolts screw into. Disengage the Bonnet Release Cable from the left Bonnet Release Catch.
8. Remove the right Bonnet Release Catch by removing the two fixing bolts and remove the Bonnet Open Sensor Switch. Disengage the Bonnet Release Cable from the right Bonnet Release Catch. Photo 7 shows the right Bonnet Release Catch removed from its fixings and with the Bonnet Open Sensor Switch removed; but with the cable still connected.
9. Completely Remove the Air filter Box (Location shown in Photo 3)
10. Loosen the Power Steering Reservoir Fixing Bolt (Photo 😎 and carefully move the reservoir a little to give clear visibility of the area beneath it. This is where the second of the two riveted clips (Photo 9) securing the Bonnet Release Cable in the engine bay is located.
11. Using an electric drill and suitable drill bit, drill the head of the rivet (Photo 9) securing the clip, which is the last cable fixing in the engine bay.
12. The cable now goes under the Cabin Pollen filter box and through the bulkhead, but don't be tempted to pull the Bonnet Release Cable outat this stage.
13. It is now necessary to completely remove the Cabin Pollen Filter box, as described in steps 14 - 17 below.
14. Mark, or measure, the wiper arm locations to enable correct replacement. Remove the two wiper arms by popping of the two wiper armfixings covers (Photo 2); removing the two fixing nuts; then carefully prise off the wiper arms.
15. Remove the plastic panel fixings securing the Cowl Vent (Photo 3) to enable the Cowl to be hinged back towards the windscreen - the Cowl does not need to be fully removed. Photo 10 shows the Cowl hinged up.
16. Remove the Cabin Pollen Filter. Photo 10 shows the Cabin Pollen Filter removed.
17. The Cabin Pollen Filter box comprises two parts and both must be completely removed. At first this appears near impossible, but if done in the correct order, and with a bit of fiddling, it works. Firstly, remove the four fixing nuts (Shown in Photo 11) securing the back part of the Cabin Pollen Filter box - Be careful not to drop the nuts. Lift the back box part out by turning it appropriately as you do so. Now remove the front part of the Cabin Pollen Filter box by removing the fixing bolt (Shown in Photo 12) securing it. Lift the front box part out in a similar manner to the back box part.
18. With the Cabin Pollen Filter box now fully removed, it can be seen where the Bonnet Release Cable passes through the bulkhead into the cabin (Shown in Photo 13).
19. Move the front passenger seat as far back as it will go.
20. Remove the front passenger door sill trim (Photo 14) by pulling it up - don't be afraid to apply a little force - It is quite robust.
21. Remove the trim around the bonnet release handle (Photo14) by pulling it up at the back to clear the locating recess; and then straight back.
22. Disengage the Bonnet Release Cable from the Bonnet Release Handle.
23. Securely attach a suitable fish wire to the old Bonnet Release Catch (See Photo 15).
24. Cut off the Star-Profile shroud (Shown in Photo 15) around the Bonnet Release Cable outer with a Stanley knife, or similar. This will make it much easier to pull the old cable through the bulkhead.
25. Carefully pull the old Bonnet Release Cable into the engine bay until you can get enough of the Fish Wire to work with. If you have cut off the Star-Profile Shroud as recommended in 24 above, the cable should pull through easily. If it feels tight, it may be snagged on something, so check before pulling too hard.
26. At this stage, I applied some grease to the new cable where the inner cable entered the various parts of the outer sheath.
27. Disengage the old Bonnet Release cable from the Fish Wire and securely attach the cabin end of the new cable to the Fish Wire.
28. Carefully pull the Fish Wire back into the cabin until you have enough of the new cable to locate in the Bonnet Release Handle. The cable should pull quite easily. If it feels tight, it may be snagged on something, so check before pulling too hard.
29 Apply a little Washing up liquid, or similar, to the cone-shaped grommet to help it fit properly into the hole in the bulkhead.
30. Route the new Bonnet Release Cable along the same route as the old cable, but don't bother with the two riveted clips that were previously removed. I ensured that there were no tight bends in the route of the cable and used a few nylon zip ties to secure the new cable along its route.
31. Engage the new cable with the two Bonnet Release catches and fit the Bonnet Open Sensor Switch back into the right Bonnet Release Catch.
32. Fix the two Bonnet Release Catches back into position, re-aligning them with either the original paint marks, or with the marks made in Step 7 above.
33. Attach the cabin end of the Bonnet Release Cable to the Bonnet Release Handle and its cable stay.
34. Leave the bonnet open, in case there are any issues, and close the two Bonnet Release Catches manually. Test that the operation of the Bonnet Release Handle opens the two catches freely and without issue. It is worth trying this a few times to ensure all is OK before closing the bonnet and trying it a few times more.
35. If all is well with testing the bonnet opening, put everything back in place that has been removed.
36. Once everything is back in place, test the bonnet again and make sure it opens and closes correctly. You may have to make some minor adjustments to the position of either, or both, of the Bonnet Release Catches if they have not been put back in the exact previous positions.

It took me 4 hours to do all of the above, but about half of that was spent working out what to do and how to remove the Cabin Pollen Filter box. Having now successfully completed the task, I estimate that it would take about two hours for a competent DIY mechanic to do the job.

Finally, I would like to thank all those who repliedto my original post; and Zazzy for his very helpful post, which gave me the inspiration to tackle the job in the first place.
 
Attached Thumbnails X350 Bonnet Hood Cable Snapped-photo-1.jpg   X350 Bonnet Hood Cable Snapped-photo-2.jpg   X350 Bonnet Hood Cable Snapped-photo-3.jpg   X350 Bonnet Hood Cable Snapped-photo-4.jpg   X350 Bonnet Hood Cable Snapped-photo-5.jpg  

X350 Bonnet Hood Cable Snapped-photo-6.jpg   X350 Bonnet Hood Cable Snapped-photo-7.jpg   X350 Bonnet Hood Cable Snapped-photo-8.jpg   X350 Bonnet Hood Cable Snapped-photo-9.jpg   X350 Bonnet Hood Cable Snapped-photo-10.jpg  

X350 Bonnet Hood Cable Snapped-photo-11.jpg   X350 Bonnet Hood Cable Snapped-photo-12.jpg   X350 Bonnet Hood Cable Snapped-photo-13.jpg   X350 Bonnet Hood Cable Snapped-photo-14.jpg   X350 Bonnet Hood Cable Snapped-photo-15.jpg  
Link to comment
Share on other sites

Hi Joe, many thanks for your replies, can't do anything till the weekend but it made interesting reading, hopefully I can get it open 

without to much hassle or damage, keep you posted, thanks again, pete

Link to comment
Share on other sites


Join the conversation

You can post now and register later. If you have an account, sign in now to post with your account.

Guest
Reply to this topic...

×   Pasted as rich text.   Paste as plain text instead

  Only 75 emoji are allowed.

×   Your link has been automatically embedded.   Display as a link instead

×   Your previous content has been restored.   Clear editor

×   You cannot paste images directly. Upload or insert images from URL.

Loading...
 Share


  • Join The Club

    Join the Jaguar Owners Club and be part of the Community. It's FREE!

  • Topics

  • Our picks

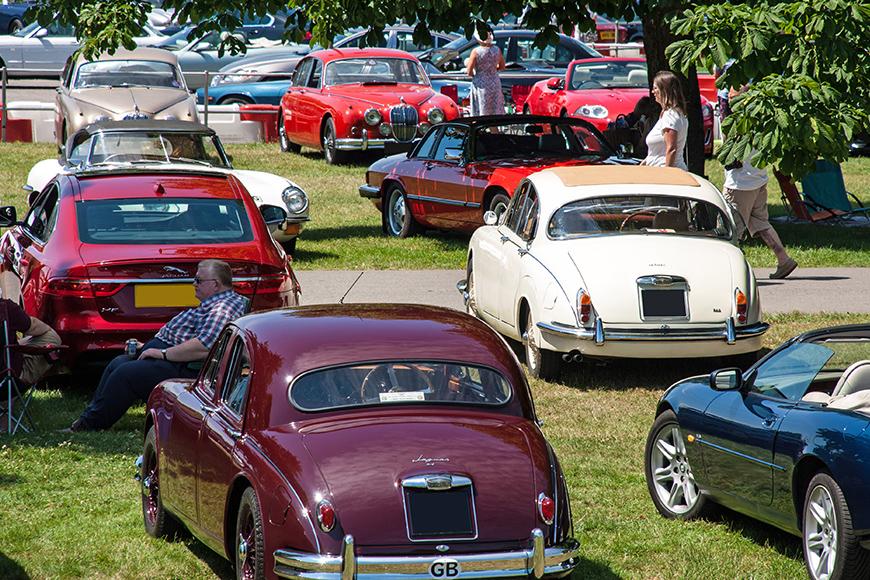
    • Simply Jaguar show at Beaulieu - Sunday 23rd June 2024
      Jaguar Owners Club have a stand at this year's Simply Jaguar event at the National Motor Museum at Beaulieu, Hampshire on Sunday 23rd June 2024

      Tickets are available online here: https://www.beaulieu.co.uk/events/simply-jaguar/
        • Like
      • 1 reply
    • JAGUAR’S LAST PETROL SPORTS CAR: F-TYPE ZP EDITION TAKES THE CHEQUERED FLAG
      Jaguar is commemorating the end of its internal combustion sports car lineage in 2024 with an exclusive limited-edition F-TYPE inspired by two iconic 1960s racing E-types

      Just 150 examples of the F-TYPE ZP Edition will be the last internal combustion-engined sports cars designed by Jaguar. These 575PS supercharged petrol V8 F-TYPEs feature specially curated interior and exterior details by the personalisation experts at SV Bespoke.
        • Like
    • UPDATE SHOW INFORMATION !

      Please find attached your club label – please can this be distributed amongst your club members prior to the event. Please ensure that they print this label and display it in their windscreen upon entry to the event, this ensures that all members wishing to park within your club area are directed to the correct parking location by our stewards. Please do not modify or add logos to the club label.

      We do ask that all individuals have purchased their tickets on an individual basis in advance via our website, to speed up the entry process on the day. This can be done on our website here until 2pm on the day when admission closes: https://www.beaulieu.co.uk/events/simply-jaguar.

      Note that we do have two entrances available, one is exhibitors gate at the bottom of the hill as you come in to Beaulieu, with the other being the normal Simply event entrance within the attraction. Either entrance is fine to use and both are open from 9.00am, with the exhibitors entrance closing around 11am.

      Jaguar Owners Club (1).pdf
    • Simply Jaguar - Beaulieu Motor Museum - 25th June 2023
      Jaguar Owners Club have a stand at this years Simply Jaguar event at the National Motor Museum at Beaulieu, Hampshire on Sunday 26th June 2023

      Tickets are available online here: https://www.beaulieu.co.uk/events/simply-jaguar/


      TICKETS & PRICES
      Participant prices are only valid if arriving in a Jaguar and taking part in the rally. They are not valid for those arriving on foot.

      Participants can make the most of our EARLY BIRD discount by booking before 28th February 2023.

      Children under 5 require a ticket, this can be booked online free of charge.

      Participant and visitor tickets will include entrance to the rest of the Beaulieu attraction, including the National Motor Museum, Palace House, Little Beaulieu, World of Top Gear, Beaulieu Abbey and its grounds and gardens.

      The best time for viewing the Simply rally is between 10am and 2pm.


      Adult


      Child


      Participants – Early Bird*


      £14.00


      £7.50


      Participants – Standard & On The Day


      £16.00


      £8.00


      Visitors


      Normal admission applies.


      Normal admission applies


      *Early bird tickets are available until 28th February 2023

      VEHICLE ENTRY
      Entry with your Jaguar is from 9am – 2pm. Please make sure you have your ticket printed or available on your phone, ready to be scanned on arrival.

      Please do not arrive early for our Simply rallies as no facilities will be open prior to 9:30am.

      Cars cannot leave and re-enter the grounds for the Simply rallies.

      ________________________________________________________________________________________________________________

      CLUB STAND ATTENDEE LIST

      We do ask for a final update on numbers 2 weeks prior to the event following which we will send out club labels to you via email for you to then distribute out to club members. Club members then need to print and display these in their windscreen on arrival. This helps us then park you all in your club area together.

      1. Trevor (admin)
      2.  Paj
      3.  
       
      • 5 replies
    • F-TYPE marks 75 years of Jaguar sports cars and its final model year update
      The Jaguar F-TYPE is the definitive Jaguar sports car from a rich bloodline spanning 75 years and including some of the most iconic models ever built
        • Like

×
×
  • Create New...


Forums


News


Membership